
RieberLok®Assembly Instructions
The installed gasket direction is critical to performance. Install the gasket with the painted face marked “INSTALL THIS FACE OUT” pointing out of the bell and facing the installer.
Download Instructions (PDF)
Remove the original Rieber Gasket
Working from the bell end of the pipe, use a medium sized flat blade screwdriver to remove the original Rieber gasket. Slide the screwdriver between the gasket and the gasket groove in the bell and pry the gasket out. The gasket has a steel band reinforcement molded in. The tip of the screwdriver must be inserted between this band and the socket to remove the gasket. This is best done by feel. Take caution not to use excessive force so as not to score or gouge the seating area.
Clean the Bell Socket and Gasket Groove
Using a clean rag, remove all dirt and other foreign matter from the socket paying particular attention to the gasket groove.
Factory Installed RieberLok
If the factory installed RieberLok®gasket is dirty or shows other signs of contamination, the gasket must be removed, cleaned, the socket cleaned, and the RieberLok®gasket reinstalled via the following instructions.
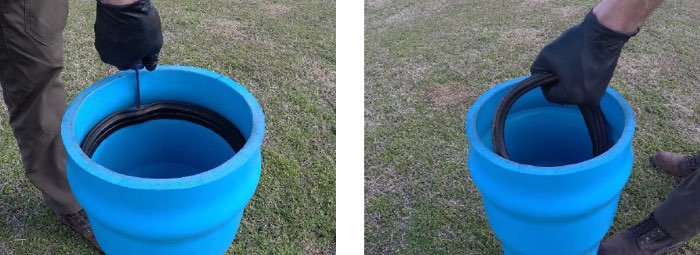
Install the RieberLok® Gasket
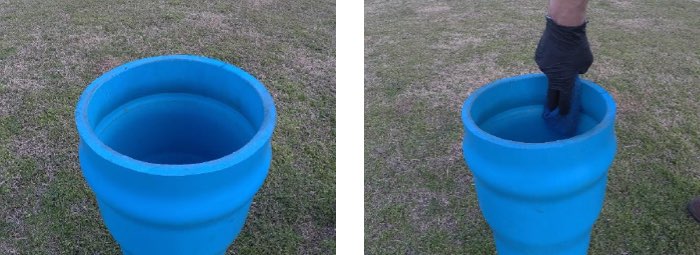
Making sure the gasket groove is clean; install the RieberLok®gasket in the pipe’s gasket groove by forming a loop in the gasket and inserting it in the groove. Larger gaskets may require two loops. Gasket orientation is critical to performance. Install the gasket with the painted face marked “INSTALL THIS FACE OUT” pointing out of the bell and facing the installer. After the gasket is expanded and seated in the groove, wiggle the gasket to make sure it is fully seated. The gasket must be installed in a clean and dry bell socket, use no lubricant.

Apply Assembly (Joint) Lubricant
Apply a light coating of assembly lubricant to the first few inches of the spigot end of the pipe including the beveled area. Apply a light coating of assembly lubricant to the inside surface of the RieberLok®Gasket. Exercise caution as the segment teeth are sharp and may pose a hazard.
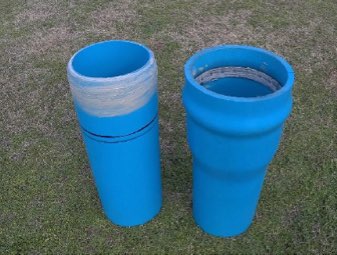
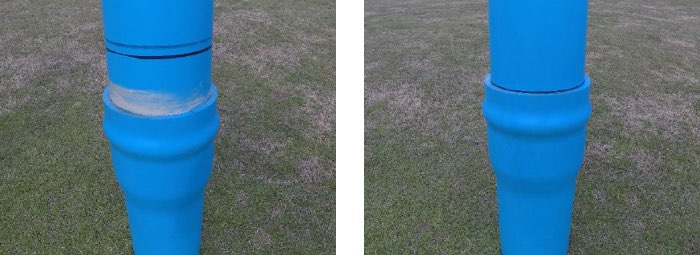
Assemble the Joint
Align the two pipes to be mated, bell to spigot, and insert the spigot into the bell of the mating pipe until resistance is felt. Be careful to avoid contaminating the lubricant covered spigot with dirt or other foreign matter as this may affect gasket sealing. Using a backhoe, chain come-a-longs or other suitable device, push the spigot into the bell until the assembly stripe is reached. Do not over insert the spigot as damage to the pipe may occur. The joint is now ready for use.
Temperature
RieberLok®gaskets should be installed at a temperature above 40o F. If the gaskets are below that temperature, they should be warmed prior to installation.
Color
Joint Deflection
After assembly, the joint may be defected according to the pipe manufacturers instructions and limits. Do not exceed the joint deflection limits stated by the pipe manufacturer.
